PO Box 426 - Highland, MI. 48357 - (248) 889-4364
|
POWERSTICKS & AccuSeals - Awarded Best New Performance Products of 2004 by RPM Motoring Monthly! |
|
|
Cobra Muffler Retrofit
Here is the procedure to install the inlet “funnels” – part # 3530-AD.
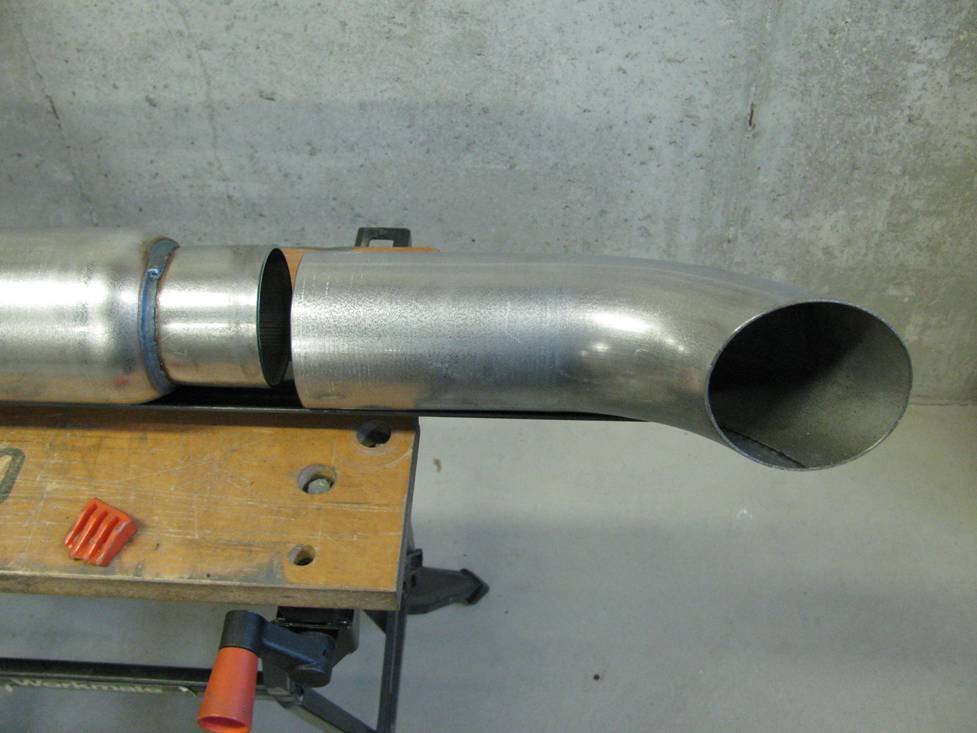
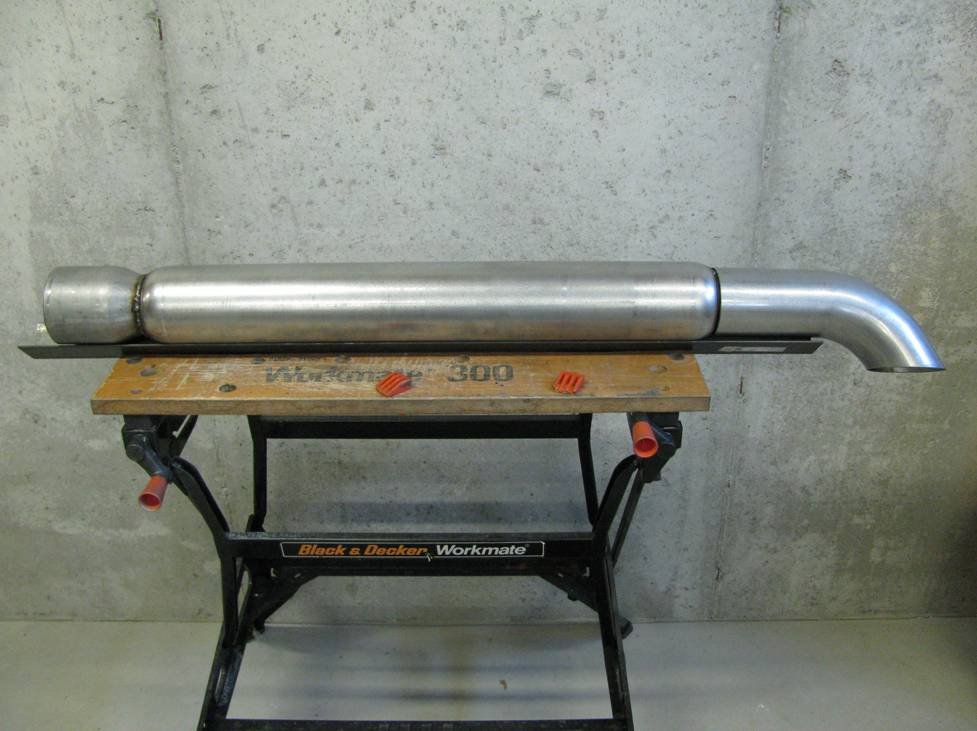
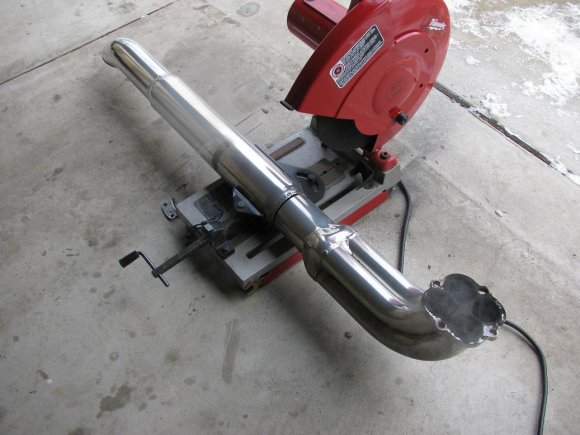
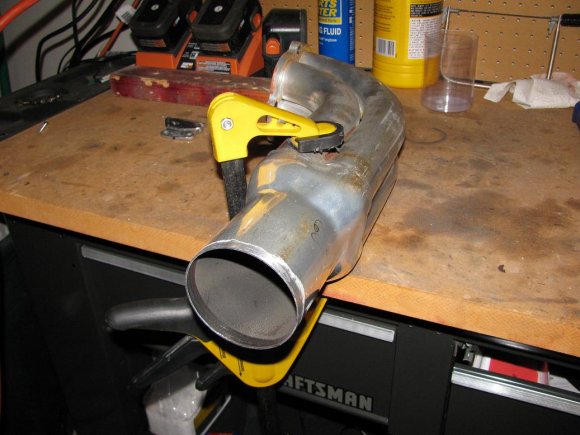
These photos show the 3-pieces that make a “re-do” of a Cobra sidepipe muffler. The 3.5” OD turndown fits over the 3” ID muffler neck – the muffler neck can be trimmed off or left on. You can re-use your turndowns, or purchase new ones from us. They can be trimmed to shorten the overall length or the turndown area of the spout. Our turndowns are mandrel-bent, 16-gauge aluminized steel. They can be ceramic coated or painted. They are made in the USA, like all of the products we produce.
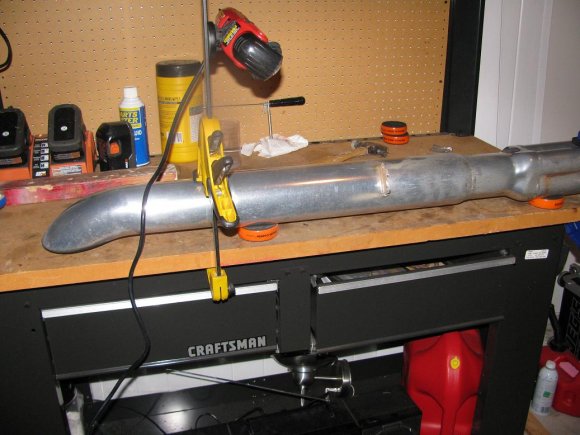
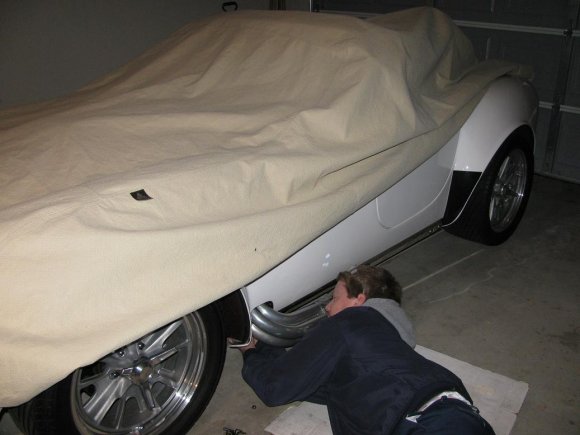
January 2011 - what a cool way to usher in the new year (literally)! A rare occasion, I visited John B's house in the metro Detroit area to personally assist him with retrofitting a pair of 3" x 24" packed COBRAPACK Mufflers on his beautiful 514 CID dual quad Factory Five Cobra. I brought the welder, the chop saw, some of the rest of the tools - John supplied me with assistance & a cold beer at the end! This was the perfect opportunity to document just how easy it is to retrofit a Cobra exhaust - there's nothing to be afraid of as you'll see. Step 1: After unbolting both sides from the headers, one of the original sidepipes is on the table & ready for surgery:
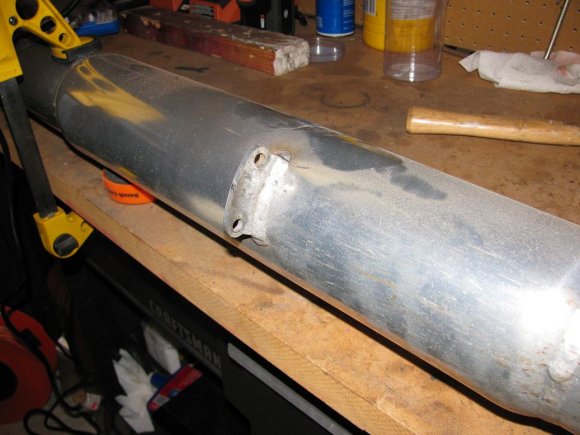
Step 2: Cut-off & save the bracket tabs - these will be re-welded to the new COBRAPACK Mufflers:
Step 3: Bracket removed with help of chop-saw. Now chopping apart the muffler from the merge collector next to the original weld (this was tough to cut through - you'll see why in the next photo):
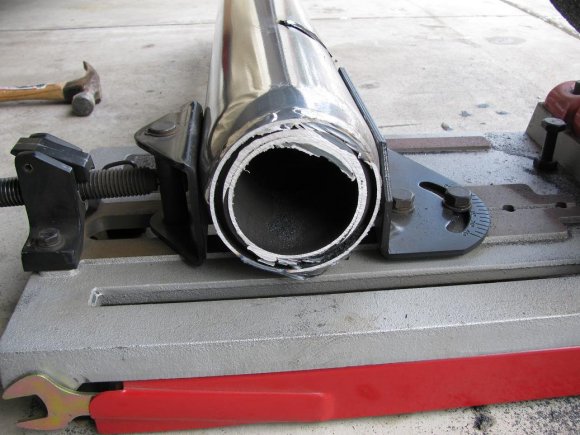
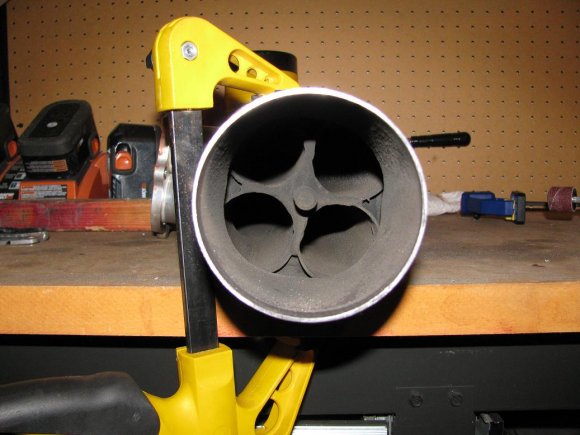
Look what the exhaust was running into upon entering the mufflers! Can you say restriction?? The outer wall is 3.5" OD. There was NO smooth transition here - just a very abrubt perimiter causing TONS of turbulence.
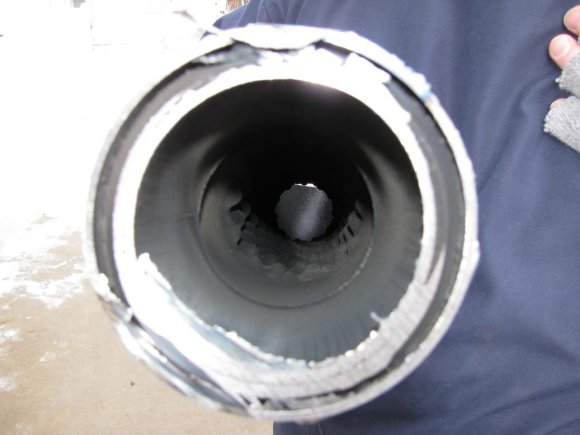
Looking into the stock muffler - around 2" flowpath core diameter. OUCH!
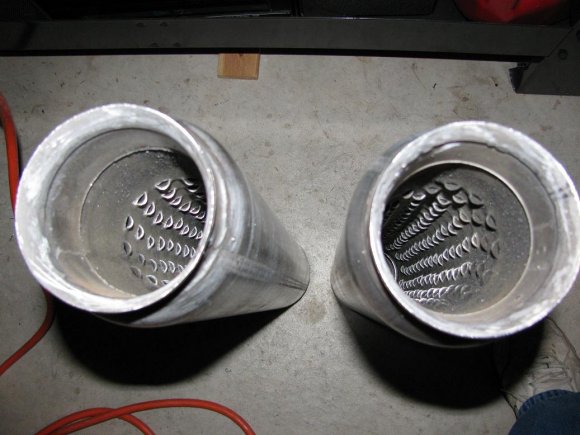
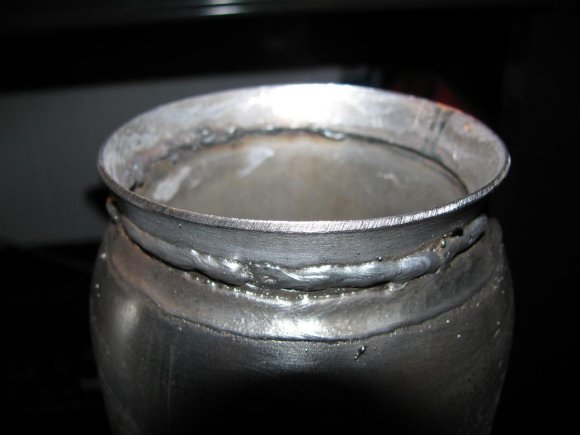
Looking inside the 3" core COBRAPACKS with the small funnel cones butt-welded to the inlet. Compare the two...............you don't need to be a rocket scientist to know which one will flow better! The funnels will slip inside of the 3.5" collectors, so you will not see them.
Step 4: After chopping the merge collectors apart from the original mufflers, clean up all the steel flash with a grinder or file - inside & out. Get all the paint or ceramic coating removed so you have clean steel to weld to. (John's sidepipes were ceramic coated - clean-up was easy though):
Looking upstream into the merge collector - why restrict it at the muffler after this clean flowpath? There's no need to lose horsepower because of a poor design.
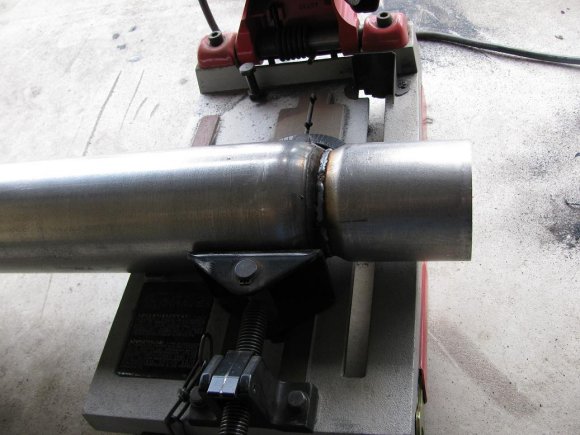
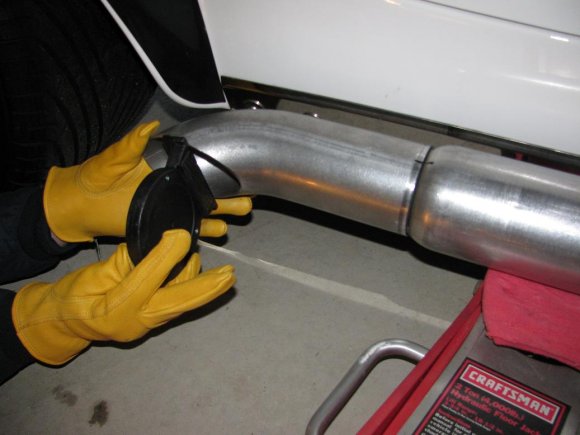
Step 5: Chopping the 3.5" to 3" reducer (part # 3530-AD) at the 3.5" end. The 3" end was already cut down & butt-welded to the muffler at the inlet end at my shop. This is going to create a nice smooth transition from the 3.5" collector into the COBRAPACK 3" flowpath - like a funnel. No turbulence allowed in this new setup!
The end funnel has been chopped again & ground-down so it just slips snugly inside the 3.5" collector. This will all hide inside the collector:
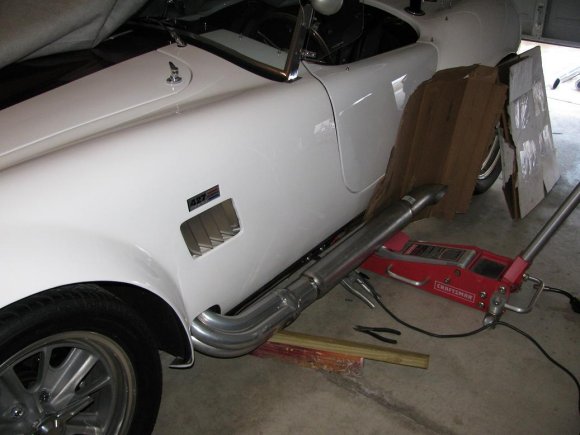
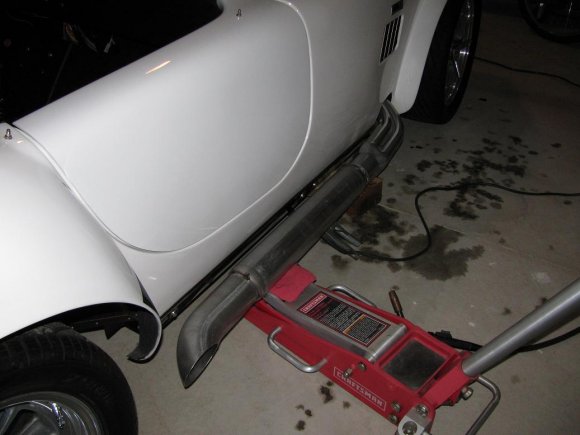
Step 6: John bolts the merge collectors back to the headers. Everything will be positioned on the car before any welding happens. John wanted to improve the alignment & fit anyway, so here was the perfect opportunity:
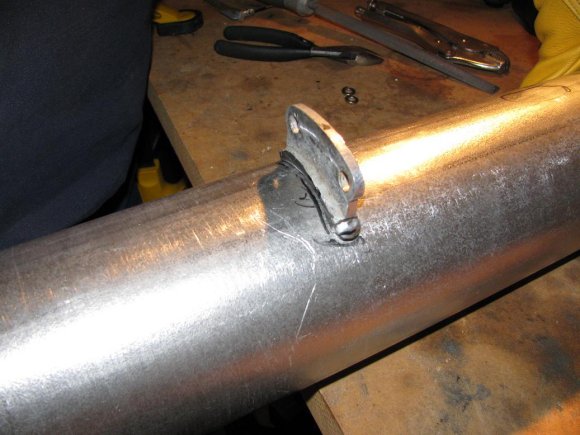
Step 7: Position everything to check out the new setup. Bolt the little tab we cut off the muffler earlier to the frame bracket, position it to the new mufflers, & trace with a marker. Remove the muffler & weld the tab into place on each muffler. (There is some play in this bracket assembly since it is isolated from the chassis via rubber isolators).
Step 8: Position & weld the tab to the new muffler:
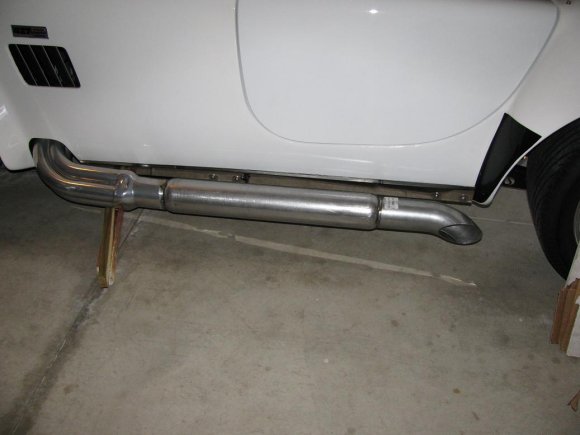
Driver's side all tacked together:
John checks the angle of the turnout (72.5 degrees) to match the driver's side. Let's weld 'er up! (Note the marks made on the turnout & muffler for alignment)
Passenger side all tacked together. Looking good! After this, John will remove both sides & take them to a welding shop where they will professionally TIG weld all the seams with precision. Then, the assemblies will be ceramic coated & ready for final assembly. This took us 3 hours to complete without an air compressor. Not a bad job for a cold Saturday afternoon in the garage!
GREAT COBRAPACK RETROFIT ARTICLE:
|


Classic Chambered Exhaust Inc. · P.O. Box 426 · Highland, MI. 48357
(248) 889-HEMI (4364) · E-Mail